Filtration Repair Parts » Step by Step Instructions » Step by Step Instructions
Step by Step Instructions
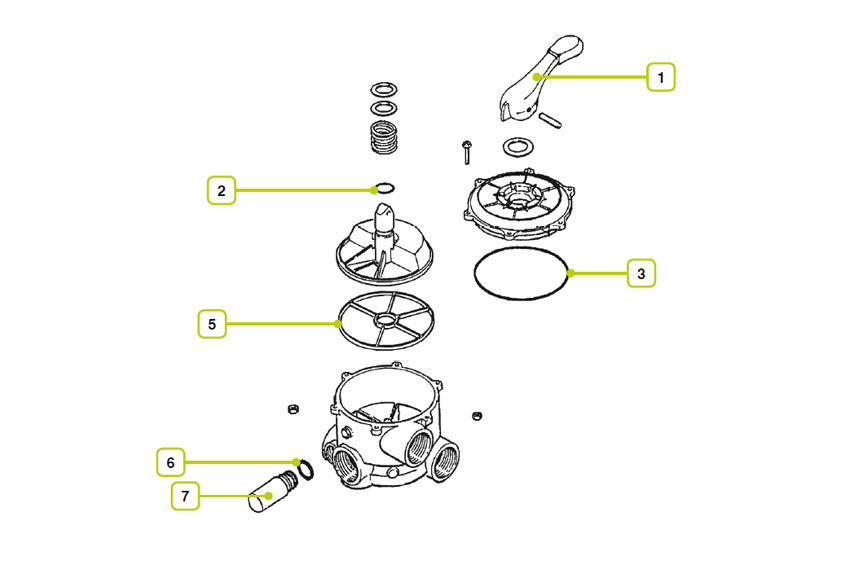
How to Replace a Spider Gasket on a Multiport Valve
Step 1
Stop pump and release all pressure from system.

Step 2
Place the selector handle at the "winterize" position (this lifts the plug off the seat).

Step 3
Remove the bolts and nuts holding the cover to the valve body. Remove the cover assembly.

Step 4
Remove the old gasket from the valve cover assembly. If the gasket is glued in, you may have to scrape it out with a small screwdriver to get most of it out. Be care that you do not score the plastic groves.

Step 5
Make sure that the gasket groove is free of water, grease, oils, debris and parts of the old gasket. Use NON-acetone finger nail polish remover to remove any gasket residue. Make sure the remover is NON-acetone or it will melt the plastic. Please note that not all multiport valve gaskets are glued in. If the gasket on your valve isn't glued, you would bypass Step #6.
Step 6
NOTICE: Once this step is started, continue through Step 10 without interruption. Using an Adhesive For Valve Seat Gasket apply glue sparingly (a bead about 1/16" wide) to the bottom only (not the sides) of the spider groove in the valve body. The glue lines must be continuous and intersect at the intersections of the grooves.

Step 7
Insert the new gasket into the groove with the rounded bead up. Press the gasket firmly into all groove areas to seat the new gasket evenly.

Step 8
Align the tab on the cover assembly with pin on the valve body, fastening it with the bolts and nuts removed in Step 3. Tighten all bolts evenly.

Step 9
Depress the valve handle and rotate it to the closest standard position (FILTER or RINSE), being careful not to rub the plug on the new gasket. Release the handle, allowing the plug to hold the gasket in place while curing.
Step 10
Minimum cure time is 2 hours. Curing for 24 hours is recommended for full strength.

.png)